Saturday, 28 December 2013

Sweet Party Nibbles: Choc & Cherry Palmiers

Most party guests are happy to dive into a savoury buffet, but watch their eyes when the desserts come out! These small palmiers are easy to make, look good, and taste excellent. I invented them when invited to pre-lunch drinks with neighbours, since usually I'd take either chocolates or savoury nibbles such as cheese crisps, and wanted a change.

Dried cranberries could replace the cherries, halved if large - or even cranberry sauce - but good cherries are, for me, the food of the gods.

A cherry stoner (usually combined with garlic press - nice combination ...) saves time and is a little less messy. The palmiers should take about 40mins from start to ready, not including time to thaw the pastry (overnight in the fridge or 2-3hours at room temp). Equipment needed, apart from cherry stoner, is just a baking sheet lined with parchment, a rolling pin (or even a straight-sided bottle!) and a sharp knife.

The recipe makes about 36 nibble-sized palmiers, and the oven should be at 175C.
50p piece indicates size
Chocolate & Cherry Palmiers
Ingredients
Half sheet of frozen ready-rolled puff pastry (or 180g) (see Method 1)
40g fresh cherries, stoned
120g chocolate or choc/hazelnut spread
A little beaten egg
1 tbsp gran sugar

Method
1  With the rolled pastry sheet still frozen, cut it in half crossways and leave it to thaw.
         The other half can return to the freezer.
2  Chop the cherries quite finely.
3  Unroll the thawed pastry on a floured board, and roll it just a little more thinly 
         widthways. Don't worry if the longer edges are not straight.
4  Spread the chocolate evenly over the pastry - if it's too thick and threatens to tear
         the pastry, it could be microwaved for 10secs first.
5  Scatter the cherry pieces in two lines lengthwise a little in from the edges like so:
The red silicon pastry mat doesn't do
any favours here, but bear with me
6  Roll up each long edge tightly towards the middle. Just before they 'meet', brush the
         facing edges with egg to help seal them, then press together and turn the whole
         thing over so the join is on the underside.
7  With a very sharp knife, slice into 10-12mm pieces. Place them flat on the baking
         sheet, a little apart, and brush them all over with egg. Sprinkle the sugar over.
8  Bake for 10-12mins or until the pastry is golden brown. 

These were very well received at the drinks do, I'm glad to say, and the recipe has been transferred to the fat but hallowed 'recipes that work' file. As opposed to the 'recipes to try sometime' collection. However, it seems clear that I need to enrol on a course on food photography!

Monday, 9 December 2013

An Idea for the Grand Christmas Lunch

Lemon-stuffed Squash, Blue Cheese and Cranberry en Croute

Is it an en croute or a Wellington? Who can tell? Either way, this festive lunch centrepiece has really impressed the family, including the meat-eaters. The main things to know before deciding whether to make it are:
   1  It needs quite a time from start to serving.
   2  It can be a little fiddly and 'hands-on'.
   3  None of the steps is difficult.
   4  Much of the preparation can be done a day or two before baking if helpful.
   5  The finished dish looks (I think) lovely and very inviting.
   6  Any leftovers will be good served cold, perhaps with chutney - and it's easier to carve  
          when cold.

As so often, I forgot to take the picture before carving. However, there are two to give an idea. I decorated mine with small pastry feet walking all over it from side to side. 

One more quick point - the geometry of the pastry means that the recipe cannot simply be halved. For a half quantity, either about two-thirds of the sheet of pastry would be safest (rather than half), or the quantities for the filling should be a little less than half. 

The idea came from a recipe in BBC Good Food magazine, but I have significantly adapted it here.
Here's how interesting the layers look!
Lemon-stuffed squash, blue cheese and cranberry en croute 
Prep 75 mins approx, cook 45m, serves 5-6

Ingredients
            350g piece of butternut squash, peeled cut into sticks 2x2x6 cm max
            250g very small onions peeled, and halved if larger than a cherry tomato
            2 tbsp olive oil
            40g pecans halved
            60g vegetarian dry stuffing mix, e.g. sage & onion
            juice of 1 lemon and half the grated zest
            2 tbsp maple syrup
            2 tbsp balsamic vinegar
            1 sheet ready-rolled puff pastry
            plain flour, for dusting
            25g dried cranberries
            110g vegetarian Stilton, crumbled
            a little beaten egg to glaze

The oven should be at 150C (fan) to start, shelf in the middle. A large baking sheet/tray is needed, lined with baking parchment.

Method
1  Put the squash, onions and oil in a roasting tin and toss around with a little salt and pepper. Roast for 15 mins. Add the pecans, stir around, and cook for 10 mins more.
2  Meanwhile, put the stuffing into a bowl and add the lemon juice and zest with 130ml boiling water or enough to make a damp mixture. Mix well and leave to cool and absorb.
3  Put the cooked squash on a plate to cool, and transfer the nuts and onions into a medium non-stick pan. Add the maple syrup, vinegar and a little seasoning, and heat gently until the onions start to caramelise – roughly 10 mins - stirring often. Leave to cool for a few mins.
4  Meanwhile, place the pastry sheet on a floured surface; roll out gently to make it a little larger and thinner. If you’ll want to put trimmings on top, cut off 2cm from one of the short edges and set aside. Transfer the pastry to the baking tray. Place the stuffing down the middle lengthways and mould into a compact sausage shape reaching nearly to each end of the pastry. At around this time, turn the oven up to 180C (fan).
5  Push in the cranberries all around the stuffing; do the same with the squash pieces lengthwise. Scatter the Stilton over, then top with the onions and pecans. Lightly press the filling together to compact it.
4  Brush round the pastry edges with the egg, then draw the 2 long edges up to meet, and pinch together to seal. Pinch together the pastry at both ends to seal, then brush all over with egg. To decorate, cut shapes from the pastry trimmings and use to decorate the top. Glaze again and make several small air holes with the point of a knife.
5  If time, chill for 30 mins before cooking. Cover with foil and bake for 20mins, then remove the foil and cook a further 25 mins. Rest for 5 mins or so to make it easier to carve. Use a very sharp knife to slice it.
Shucks. Half already served before I remembered.
Options: Flaked almonds or halved cooked chestnuts could replace pecans, and freshly-squeezed orange juice used in place of lemon. Cranberries go really well here, but roughly chopped dried apricots could be used.

To prepare a day or two ahead, keep separate in the fridge the cooked squash, the caramelised pecans + onions, the cooled stuffing and the defrosting pastry. The whole thing can be made up the night before, and brushed with egg just before putting in the oven.

Wednesday, 20 November 2013

TIBITS Vegetarian Restaurant in London - a Review

After much anticipation, we ate lunch as a family of 4 adults and 2 children at Tibits vegetarian restaurant on a recent Saturday. Here's what I thought - and the review is totally independent without any input from the restaurant.


First Impressions
The restaurant looked small, until we saw there is seating downstairs as well. Centre of attention is their 'food boat', and we were immediately greeted by a chap asking if we'd been before and explaining the system. Starting to get busy at 12.30 but we sorted a table for six; by about 1pm there were very few available tables.

The System
You can buy drinks at the counter initially, but most people prefer to choose their food first and pay for it together with drinks. First, find a table, then take a plate and cruise (food boat ...) around the buffet taking what you fancy - hot food on upper shelf, cold below. Then take the filled plate to the counter where it is weighed and charged acccordingly. Same system for desserts - serve then weigh and pay. We set up a tab at the start, gave some ID, and just settled at the end.

Ah, the Food!
A large range of cold dishes had something for everyone. Lots of interesting and sometimes unusual salads and other cold dishes variously containing lentils, beans, aubergines, squash and other vegetables for example. Plenty of sauces, dressings, and fresh nuts to sprinkle. Hot food included deep fried breaded cheese-stuffed jalapenos, breaded onion rings, quiche, potato wedges, a squash stew and plenty more. We all agreed about the range being so tempting it was difficult to stop. (See prices below!) All very good whether you fancy a light lunch or a more substantial meal. Oh, and the delightful bread rolls are complimentary - you lift them off your plate while it's being weighed!

I felt that the limited range of desserts was less exciting though I didn't try the cheesecake. Sticky toffee pudding (vegan) was OK but not special, while the fruit crumble was nice.

Prices - Food
The publicity shows a sample decent plate of food for (if I recall) £7.50. Our six main courses varied from (fairly modest but enough) at £5.40 up to £15 for a large plateful which included heavies such as quiche and potatoes (hugely enjoyed). Four of us had desserts,  which cost from £1.60 to £3.70. Given that we could each see and choose everything we ate, the cost was reasonable for a central London venue and a  very pleasant experience.

Drinks
One of our young ones chose water, the other an interesting ginger lemonade (£2.40 for a glass). Tap water is freely available to self serve, while mineral water is £1.90 for a half litre. Wine seemed expensive; cheapest was Merlot (very drinkable) or Sauvignon Blanc at £16.20. Lager £4.20 a pint, 330ml bottled beers around £3.90.

Minimal Downsides
I have a thing about hot food at buffets - that thing is, you rarely get them. Here the hot food was not much more than lukewarm and the quiche had run out when I reached the plate. What was offered was still very tasty, however. We went to the counter to settle the tab at a busy time, and there was a free-for-all during which several people managed to reach in front of us to put their food on the scales for weighing and were immediately served. The wait to pay was therefore quite long. Some kind of queueing system would prevent this irritation.

Overall ...
There are three Tibits restaurants in Switzerland, and it would be surprising if more did not soon open here. This one was already a favourite with the London-based part of the family. The staff are friendly and helpful, the food is interesting, unusual and very enjoyable and self-service of course makes it quick providing it's not a busy time. The location is accessible, too - Heddon Street, off Regent Street. We used often to meet to eat at Italian chain restaurants, but we can do that at home while for similar money and in central London too, Tibits is safely vegetarian and (at present) unique. We'll be back!

Contact
http://www.tibits.co.uk
0207-758-4110
12-14 Heddon Street, London, W1B 4DA

Sunday, 10 November 2013

Mushroom, Pea & Blue Cheese Risotto in the Slow Cooker

There once was a large slow cooker in our kitchen, but I broke the lid and didn't replace the cooker. Recently, though, I thought it would be good to go back to the slow method, and bought a very fine (though small - 1.5 litres) slow cooker by Lloydtron. Here it is:
It's only 120watts, and the inner ceramic liner lifts out and is more or less wipe-clean. I am in love with it.

But to business. I believe this recipe to be my best risotto yet. It's not quite 'throw everything in and leave it', as I prefer to add the vegetables and cheese once the rice is on its way to being cooked. For anyone who uses this and has a differently powered/sized slow cooker, timings may be a bit different. 

The recipe would work perfectly well cooked on the hob, and would be faster, but would need a lot more attention - although I have never held with the 'keep the stock hot and add one ladle at a time' plan. The quantity makes 2 generous portions, and using my cooker it took about 1h45m from start to serving. I couldn't offer a picture of the finished dish - had to be served up in a hurry in time for The Archers, and forgot about photo.
Mushroom, Pea and Blue Cheese Risotto

Ingredients
Knob of butter (size of a walnut shell)
1 medium onion, peeled and fairly finely chopped
120g risotto rice 
330ml hot vegetarian stock
80 frozen peas, left to defrost
75g mushrooms, thinly sliced
40g blue cheese (e.g. Danish, Stilton), crumbled
Ground black pepper - about a level tsp

Method
1  Switch the slow cooker to High, and put in the butter.
2  Once the butter is melting, add the onion and rice, and stir to coat it all with butter.
         Leave for 5 mins.
3  Add the stock, stir, and leave for 45 mins, stirring once or twice meanwhile.
4  Add the defrosted peas, the mushrooms, cheese and pepper and mix well.
5  Leave for about 40m, stirring very occasionally, until the stock is absorbed.

And that's it. Plenty of time while it's cooking to play LinkLines, prep a side salad, and have an aperitif.

Other Options
Sweetcorn or broad beans could replace the peas; snipped herbs such as basil, thyme or parsley added towards the end would go well - though perhaps not rosemary unless it's added at the start and so would have plenty of time to soften. Mixed dried mushrooms could be used instead of fresh, in which case they should be covered in boiling water in a bowl, left for 10 minutes, and drained well before adding. Grated vegan hard cheese could replace the blue. Vegetarian white wine could be substituted for part of the stock, although I prefer it as nature intended.


Monday, 28 October 2013

Apple and Pear Chutney - nearing the end of the crop

Last of the fruit-themed posts for a bit, as supplies from the garden dwindle in the rack.

I've made several chutneys recently, and have realised that I don't like large chunks of anything in them. So for this recipe the fruit is cut in to pieces a little smaller than a peanut, and that seems ideal.

If only one of the two fruits is available, that's fine - but if it's only pears, a little less cooking time is needed as they soften more quickly than do apples.

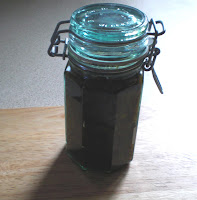
The method is easy and should take about 30 minutes including prepping the fruit. This quantity fills just about two standard jam jars. The picture looks a bit odd, as it's a very small jar - all other jars are full of the wretched strawberry-grape jelly as I try to get it to set for a third time. The rest of my chutney had to go into another container until Mr P finishes the marmalade and the jar becomes available.
Exactly what it says on the jar ....
Apple and Pear Chutney
Ingredients
(The fruit amounts are as-they-come unpeeled weight)

500g apples (approx 4 medium)
250g pears   (about 2)
1 tbsp oil
1 heaped tsp coriander seeds
1 heaped tsp mustard seeds
80ml vinegar - cider or white wine type
60g sultanas
60g soft dark brown sugar

Method
1  Quarter, peel and core the fruit, then chop into pieces a little smaller than a peanut.
2  Heat the oil in a medium pan.
3  Add the coriander and mustard seeds, cover the pan, and fry the seeds. Soon they
         will start popping, so then fry them gently for 2 mins, stirring occasionally.
4  Add the fruit, vinegar, sultanas and sugar and mix gently.
5  Bring up to a simmer, and cook until the fruit is soft - 10-15 mins - stirring from 
         time to time.
6 Pour into the clean jars - using a funnel makes this easier, otherwise pour the
         chutney into a jug and use that.

This turned out really well, I thought. Goes nicely with crackers and cheese, cheese on toast, on a vegburger or with vegetarian sausages. And I'm thinking these fruits might be substituted with small chunks of mango, though a little less vinegar and a shorter simmering time might be needed. Must try that.

Monday, 21 October 2013

Apple and Cinnamon Traybake - it's a piece of cake

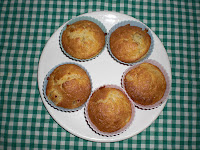
Unintentionally, the photo bears more than a passing resemblance to the previous post pic for pear muffins. But hey. The squares look rather large, but the apple is actually quite small!

This is another fairly quick and very easy recipe, I think, and the result is a traybake of very nice, moist and not too crumbly squares (or you could do triangles) with a mildly crunchy topping. Prepping the apples takes a bit of time, so I do this first and turn on the oven after that. Lining the baking tin with parchment is worth the trouble.

Although there are 10 steps in the 'method', the preparation steps (1-8) wouldn't take much more than 20 minutes.

I use a 24x18cm baking tin to get just the right height of the finished cake. (My calculator says that's roughly the same as 21cm square.) The mixture doesn't look that much and spreads quite thinly in the tin, but it should all rise nicely. This quantity makes 24-30 squares.
Apple and Cinnamon Traybake
The oven will need to be at 150C, middle shelf. 24x18cm baking tin, lined with baking parchment.

Ingredients
4 medium apples 
170g butter 
240 caster sugar
3 (medium) eggs
2 tsp vanilla extract (or 3 if using essence)
265g self-raising flour
2 heaped tsp ground cinnamon
60g demerara sugar (otherwise soft brown)

Method
  1  Quarter, peel & core the apples. Chop to hazelnut-sized pieces.
  2  Soften the butter in a large bowl, e.g. 10sec in microwave or sit 
         for a minute over a pan of very hot water.
  3  Add the caster, eggs and vanilla and beat together until smooth.
  4  Stir in the flour and cinnamon until none is visible.
  5  Pile half the mixture into the tin and spread over the base.
  6  Scatter half of the apple pieces evenly over it.
  7  Add the remaining mixture, smooth over and top with the rest of 
         the apple.
  8  Sprinkle the demerara sugar evenly over this.
  9  Bake for 30-35 mins until top is browned and a skewer inserted 
         into the centre comes out clean.
10  Leave in the tin for about 10mins, then cut cleanly into squares.

This recipe also works well if apples are replaced by 3 mashed over-ripe bananas, mixed in with the flour instead of layering. In either case the cinnamon could also be left out & some chopped nuts (pecan/walnut/hazelnut) added. All of these can be frozen, or kept in a tin in the fridge for a few days.

Sunday, 13 October 2013

Pear Muffins, Wheat-Free

Yes, I know I've recently done gooseberry muffins, but these are a different kettle of fish. Ran out of plain wheat-free flour so used self-raising. If plain flour is used, an extra teaspoon of baking powder should balance things out.

As can be seen in the picture, they look more like rock cakes although the texture is softer than that. Should have smoothed the dough before baking. Taste great, though, and it's hard to believe they've no wheat content.

This recipe makes about 16 muffins. I used my 12 silicone cases and 4 paper variety. When they came out of the oven, the silicone ones just floated out, while the paper had to be peeled off carefully to avoid crumbling.

Pear Muffins, Wheat-Free
These need the middle shelf of the oven, at 170C, and muffin cases set out on a baking tray.

Ingredients
270g wheat-free self-raising flour
1 tsp baking powder
1 tsp xanthan gum
Half teaspoon salt
80g granulated sugar
350g ripe pears (about 3 medium), cored, peeled and chopped fairly finely
1 egg
100ml milk
50g melted butter
1 tbsp caster sugar (optional)

Method
1  In a large bowl, mix the flour, baking powder, xanthan gum, salt and sugar.
2  Add the chopped pears and mix them in to coat with flour.
3  In a smaller bowl, beat the egg, milk and melted butter lightly together, then stir into
         the flour mixture to form a soft dough with no dry flour visible.
4  Fill each muffin case to half or three-quarter level, making sure each has some pear
         pieces, and smooth over!
5  Bake in the oven for 16-18 minutes or until a skewer poked through comes out clean.
6  Sprinkle with the caster sugar if used, and leave on a rack to cool.

I'm thinking that, as xanthan gum isn't in everyone's kitchen, it would probably be OK to leave it out. However, it's trailed as helpful to make a decent spongy texture so I use it in all my wheat-free baking, just in case.

These muffins freeze well. Otherwise, if they've been around for a while, they'd be good crumbled as the base for a trifle, with vegetarian jelly poured over to set, topped with sliced ripe pears, then a thin layer of custard and finally whipped cream. For decoration I fancy honeycomb pieces or finely chopped gorgeous stem ginger.

Saturday, 21 September 2013

Easy Tortelloni with Blue Cheese & Walnut Sauce

You say tortellini, I say tortelloni ... Let's call the whole thing pasta! Actually these are very similar, the only difference being size - tortelloni is the larger. Easy to remember which way round - the 'o' is fatter than the 'i'. I used a chilled, stuffed tortelloni here as that's all I could find, but either works well, and the plain dried version would be fine, too.

We recently spent a week in Bologna, and I'd been going wheat-free as much as possible - fun in Italy, to be sure. But for the last evening I gave up and had a really great tortelloni dish, more or less replicated here.

Once the ingredients are assembled, the dish should take no more than about 20 minutes and it's cooked on the hob using two pans. This quantity serves two - which is a whole chilled pack of the stuffed variety. If using dried plain tortellini, a suitable quantity for two might be about 40 pieces, cooked according to packet instructions. In this case some shredded spinach could be added to the sauce.

History Lesson
This pasta is a speciality of Bologna. Local legend says that the chap who invented it was looking for inspiration for a new pasta shape. When he caught sight of his new lover's navel - well, that was it. Almost enough to put you off the pasta, but hopefully not quite.


Tortelloni with Blue Cheese and Walnut Sauce
Ingredients

100ml double cream
50ml milk
60g vegetarian blue cheese, crumbled (e.g. Danish or Dolcelatte if suitable)
300g pack stuffed fresh tortelloni (e.g. spinach/ricotta, or about 40 pieces plain dried)
30g walnut pieces roughly chopped
Half tsp ground black pepper
Optional - sprig of fresh herb to garnish

Method
1  Heat the cream, milk and cheese gently in a small pan, stirring sometimes, until the
          cheese is melting, but don't let the mixture boil. Keep it just under the boil.
2  Meanwhile, boil a good amount of water in a large pan, add the tortelloni and cook as
          instructions. The fresh pasta will need about 5 mins at a gentle simmer and very
          careful handling to avoid the pieces opening up. Dried pasta will need a little longer.
3  When the pasta is almost ready, add the walnuts and pepper to the cream mixture.
4  Drain the pasta, divide between hot dishes or bowls and pour the sauce over them
5  Garnish with the herb if used.

And that's it. I realise it's not exactly an aid to slimming, but just look at the Italians - very few of them seem overweight, and almost none of the young people, despite their tucking into pizza and pasta more often than do most of us.

As an afterthought, of course the sauce would go with almost any pasta. Even the very nice wheat-free penne in my cupboard.


Wednesday, 28 August 2013

Pushover Wheat-Free Cranberry & Coconut Biscuits

They are what it says in the title!

With my long history of sporadic reaction to wheat, I know that if I go too far then my system will complain. Many years ago, self-diagnosed after 6m of medical tests, I then went totally wheat-free for a couple of years and was immediately well. Now I'm able to get away with most things in moderation.

Must have been too devil-may-care recently, as the intolerance is back and so, therefore, are the wheat-free ingredients. My first version of this recipe was with spelt flour - I think spelt is an early ancestor of modern wheat - and it caused problems. This is the adaptation using Asda's 'free from' plain white flour, and it worked very well. It is made from rice flour and potato starch. However, I would expect the recipe to work with straight plain wheat flour too.

The recipe makes about 20 biscuits. I've called it pushover because it's quite quick and involves no 'rubbing in' or 'rolling out and cutting'. Preparation should take 20-25 minutes, and baking 12 minutes or so. Cook on a baking sheet, either a good non-stick one or lined with baking parchment.


Wheat-Free Cranberry & Coconut Biscuits
The oven should be ready at 170C.

Ingredients

130g demerara sugar
80g melted butter (20 secs in microwave, or in a pan)
270g wheat-free flour (plus a little for shaping later)
2 tsp baking powder (should be wheat-free - usually are)
Half tsp salt
1 egg
2 tsp vanilla extract
2 tbsp milk
25g dried cranberries, snipped if larger than a pea
50g desiccated coconut

Method

1  Place the sugar and melted butter in a large bowl and beat well - either with a wooden
       spoon or using an electric mixer.
2  In another bowl thoroughly mix the flour, baking powder and salt.
3  Beat the egg, vanilla and milk into the sugar/butter mixture.
4  Add in the flour mix with the cranberries and coconut and mix gently to form a soft
       dough. Make sure the cranberries are evenly distributed.
5  Using hands, roll pieces of the dough into spheres about the size of a ping-pong ball
       and place them on the baking sheet with gaps between of about 4cm as they'll 
       spread a little. Flour your hands from to time if the dough is sticking. Flatten the 
       biscuits a little with the back of a fork, leaving tine marks.
6  Bake in the centre of the oven for about 12-13 minutes but check after 10. The edges
       should be turning golden and the tops starting to firm up.

Chocolate chips - white or dark - would work well here (if they're wheat-free), perhaps with cranberries but not maybe with the coconut. Lemon would be worth a try, too: perhaps omit the milk, berries and coconut and add the grated zest of 1 large lemon and all of its juice at stage 3. That would make slightly fewer but very interesting biscuits!

Sunday, 18 August 2013

Spicy Courgette Chutney

Each year I suggest that a couple of courgette plants might be enough, but currently we have about 10. Result: courgette fritters, longboats, gratin, dressed ribbons, buttered, cake and now ... chutney. (Can't hack ratatouille, sadly. Yucky slop.)

This recipe uses a kilo of courgettes, which is 'several', and makes around 850g, or roughly three standard jam jars full. I have adapted a recipe by Pam the Jam at River Cottage. Mine takes 2 hours for the courgettes to salt, then another hour and a half - though most of that is the simmering of the chutney which gives the near environment an appetising, spicy feel.

Any one of the seeds and spices could be omitted, though they go together very nicely.

Shortly before the chutney is ready, the clean jam jars should be placed in a fairly low oven (100C) for a few minutes to sterilise them. Not that the vinegar wouldn't do a great job on its own.

Spicy Courgette Chutney
Ingredients
1 kg courgettes, wiped, ends trimmed, chopped into 2cm lengths then halved across
2 tbsp salt
2 medium onions, white or red, peeled and coarsely chopped
6 garlic cloves, peeled and roughly chopped
2 red chillies, finely snipped (keep the seeds in if you like things hot)
40g piece of fresh ginger, peeled and chopped
75ml of oil - olive, veg or rapeseed
2 tbsp black mustard seeds
1 tbsp coriander seeds
2 tbsp ground cumin
1 tbsp turmeric
200ml cider (or wine) vinegar
175g demerara sugar

Method
1  Put the courgette pieces in a colander in the sink and sprinkle with the salt. Leave them
       about 2 hours to drip, then rinse and pat dry.
2  Blitz the onions, garlic, chilli and ginger together to a coarse paste or a very fine chop.
3  Heat the oil in a large pan, then add the mustard and coriander seeds and fry gently for
       5 mins, stirring often.
4  Add the onion paste, cumin and turmeric to the pan and fry for a further 5 mins, again 
       stirring often.
5  Add the vinegar, sugar and courgettes and mix well. Simmer on a low heat for 60-75
       mins until the courgettes are softened, most of the liquid has evaporated, and the
       mixture is starting to get sticky. This needs stirring from time to time.
6  Spoon into the hot jars, pressing down as you go to remove air. Seal and store,
       preferably in the dark.

I'm loving this with vegeburgers, vegesausages and savoury rice, and as part of a ploughman's. Here's my latest ploughman's with home-made wheat-free bread and Cashel Blue cheese. The chutney uses our own courgettes, onions, garlic and chillies, and the tomato is from the garden, too. Earth goddess.

It does take a while, but this is the way more of our courgettes will be heading shortly. I might even try putting in a few of the beastly cucamelons next time - got to do something useful with them!

Thursday, 4 July 2013

Gooseberry Muffins - a Delight and so Easy to Make

Since it's very much the gooseberry season around these parts, and we've done the crumble, I woke this morning with the thought that gooseberry muffins might be worth a try. By 9am the recipe was written and the muffins cooked and photographed. See me move!

I think they turned out really well, and the quantities given in the recipe made 12 medium muffins. Used always to use paper muffin cases, but they often stuck and were hard to remove without taking a chunk of the muffin with them. Finally got round to buying a set of twelve medium silicone cases (from Tu at Sainsbury's as it goes), and now I'll never go back to paper.

Once the gooseberries are washed and topped and tailed - with scissors is easiest - the method takes about 15 minutes. And there's NO RUBBING IN and you don't need a food processor. So including baking, only around 30-35 minutes is needed from start to ready. They're lovely warm from the oven.
Ingredients
170g plain flour
2 level tsp baking powder
Quarter tsp salt
80g sugar (gran is fine)
1 egg
150ml milk
50g butter, just melted (e.g. in microwave)
180g gooseberries (prepared as above)

12 medium muffin cases should be ready; if paper, use a bun tin to keep their shape but if silicon, just arrange them on a baking sheet. Oven should be at 170C.

Method
1  Place the flour, baking powder, salt & sugar in a medium bowl and mix well.
2  Add the gooseberries and mix so they're coated in flour.
3  Beat the egg lightly in a small bowl, them stir in the milk and melted butter.
4  Add the egg mixture to the flour mix and stir briefly but quickly so that no 
          lumps of flour are visible.
5  Use a spoon to drop the mixture cleanly into the cases, filling them about half 
          to three-quarters full and making sure each has its share of fruit.
6  Bake in the centre of the oven for 15-18 minutes until browning nicely. 
          They're done when a skewer pushed in from the side comes out clean.
_________________

Of course other fruits can be used, e.g. blueberries, dried or fresh cranberries, raspberries and so on, though if the fruit used is sweet, 20g less sugar will be needed. For me, this recipe is a definite keeper for my 'special tried and tested' recipes folder. Nerd.

Tuesday, 2 July 2013

13 Time-Saving Thoughts for Cooks

Thirteen is my luckiest number, so here are that many ways of saving a little time in the kitchen. If, like me, you're often prepping food in a rush, there might be something here which is worth a go.

 1  Salad dressing: put all ingredients into a small jam jar, seal and shake vigorously (the 
         jar that is). Will keep well in the fridge for a while.

 2  Grate cheese onto a piece of kitchen paper or greaseproof (rather than a chopping 
         board), then fold and pour.
Strawberry huller
 3  Prep strawberries just before they're needed: use a huller (cheap like the one above, or
         slightly smarter, e.g. from Lakeland), then wash.

 4  If spreading Marmite in baking, for example onto puff pastry, put the required amount
         into a small microwaveable bowl and microwave for 10 seconds. It'll be runnier
         and easier to spread, and will go further - usually needs to be used sparingly anyway.
 5  Use scissors to top & tail gooseberries. If they have that mildew thing, soak in water
         for a while then just rub the skins clear. Scissors are also quickest for 'chopping'
         herbs or dried chillies.

 6  To skin tomatoes quickly, slash the skins a couple of times then put into a bowl of
         just-boiled water for a couple of minutes. The flesh expands and, hopefully, bursts
         out of the skins.

 7  When a cooked dish needs reheating in the oven (e.g. pastry based which would go
         soggy in the microwave), it's still worth microwaving for a couple of minutes while
         the oven heats up - saves quite a useful amount of time.
 8  Freeze freshly washed (and patted dry) mint, thyme, sage or parsley leaves whole.
        When needed, take the amount out and just crumble it straight away.

 9  If freezing a large quantity of fresh veg, prepare the approx number of freezer bags first.
         Put the portion size you want in a bag and weigh it, then duplicate the weight for
         other bags until all the veg is packed. Saves time judging the portion each time.

10 I've mentioned this one before: when a recipe says to rub butter into flour, I find it still
         works if you use melted butter from the microwave and just mix it into the flour. If
         you try this, it might be best to experiment first! It can same time, effort and mess.

11 An oldie but worth a mention: when cooking on the hob, use a lid. Boils more quickly
         and needs slightly lower heat to maintain cooking, saving time and fuel.
12 Use a potato peeler to make ribbons from courgettes, then marinade them in dressing -
         no need to cook. Same for raw, peeled carrots.

13 To make biscuit crumbs, for example for a cheesecake or banoffee pie, put the whole
         biscuits into a large polythene bag and use a rolling pin to crush. Quicker than
         getting out the blender then washing and putting it away.

So that's my thirteen. If you carry out each one just once, you should save enough time to make a lemon drizzle cake. That's what I'd do.