Friday 21 December 2012

The Two-Pound Diet Rule at Christmas!

For anyone keeping an eye on the scales all year, here's a reminder of ten ways to help ensure that you don't put on more than two pounds over the holiday. This is a very manageable amount for sorting out later, and it's a bit of a mantra of mine.

At Parties

 1  Don't stand close to the food table. Looking at the food stimulates the appetite, and
          watching others helping themselves encourages you to do the same. 'Foodology'.

 2  Alternate alcoholic drinks with soft, a favourite being sparkling mineral water with a dash
          of fruit juice. Or a clear fruit juice such as cranberry.

 3  Don't fill a wine glass more than two-thirds, and don't top up until the glass is empty.

 4  Put a limit on canapes based on puff pastry. Usually great, but very calorific and don't
           fill you up.
by D.L.
via flickr.com
The Great Christmas Lunch (vegetarian type)

 5  Nut roasts are back in favour, as their fat is apparently 'good fat', but it's filling so a
          small helping goes a long way.

 6  Rather than a cream-based sauce, consider onion gravy - fry finely chopped onion in
          just a little olive oil for a few minutes, add a little soft brown sugar and continue to
          cook for another few minutes to caramelise, then add stock (e.g. from Marigold
          low-salt bouillon powder) and a shake of soy sauce and simmer 10 minutes. Mix
          a dessertspoon of cornflour with a little water to a paste, add to pan, and continue
          to heat gently, while stirring, until the gravy thickens.

 7  Instead of pure cream for desserts like pavlova, creme fraiche mixed with thick plain
          yoghurt does well. Same goes for serving with Christmas pudding instead of
          brandy butter.

 8  As a rough guide, 3 chocs from the Quality Street/Roses tin contain 100-130 cals.
          Rather than take one, then another, and so on, take your three favourites straight
          away and eat them slowly. Or four.

 9  If your group takes liqueurs after the lunch, a brandy - or other clear spirit with diet
          mixer - is lighter than one of those gorgeous cream liqueurs. Sadly.

10 Best to avoid the 'Could I manage one more potato?', no matter how others might
          encourage it. A good mantra is, 'Could I manage without it?'.

Of course this isn't meant to be kill-joy - there's plenty of joy around for most of us at Christmas. But so many people weigh themselves after the holiday and feel despondent about the extra weight. Aiming to stick to a max of two pounds extra avoids this without being too much of a wet blanket. It also means that it won't take much effort to lose it afterwards.

Happy Christmas, everyone!

Sunday 9 December 2012

Christmas Celebration Pasties

There are lots of ideas around this year for a 'festive' lunch for vegetarians, and I've tried plenty of them. Still, this is my own recipe for my favourite, and I'll be making it - or versions of it - throughout the year.

The recipe makes 2 pasties, but of course it can be adapted for any number. Ready-prepared but uncooked, they can be frozen without brushing with milk. I've not tried freezing the cooked version, as they just get eaten straight away.

I usually use ready-rolled puff pastry, and after the pasty circles have been cut out, the trimmings could be gathered together and rolled out more thinly than before to make, for example, mince pies or jam tarts. Or spread thinly with Marmite, rolled up, thinly sliced then baked to make Marmite pinwheels. The pastry can be worked on the non-stick paper in which it is already rolled. For the chestnuts, a vacuum-packed type such as Merchant Gourmet, or a tin of whole chestnuts, is a short cut, but if raw, slash the skins and boil in water for 20 minutes or so before removing shell and fuzzy skin.

Preparation takes about half an hour, and baking 20 minutes, so should be about an hour from start to serving.

For neat, uniform pasties it's good to use a pasty maker like this:
In December 2011 Lidl were selling sets of 3 in different sizes. This is the largest; I have the smallest size as well, and it makes lovely two-bite-sized pasties. Helpful - but not vital - are a pastry brush and, for decoration, a suitable biscuit cutter such as Christmas tree, holly leaf or star. Lining the baking sheet with baking parchment ensures the pasties won't stick, otherwise it should be greased.

Christmas Celebration Pasties
Ingredients
1 sheet ready-rolled puff pastry, thawed
1 tbsp vegetable or olive oil
1 medium onion, peeled & finely chopped
Half a small stick of celery, finely chopped (optional)
2 medium mushrooms, trimmed & coarsely chopped
5 cooked chestnuts, coarsely chopped
2 tsp cranberry sauce (optional)
Scant half tsp ground black pepper
3 tsp double cream or soya cream
Half an eggcupful of milk

Oven should be heated to 180C, shelf above the middle.

Method
1  Unroll the pastry and keep flat on the wrapping from around it. Using the underside
       edge of the pasty maker, cut out 2 circles, otherwise use an upturned saucer about
      15cm diameter and cut around it. Leave in the fridge while preparing the filling.
2  Heat the oil in a small pan, then add the onion and celery and fry gently for 5 mins,
       stirring occasionally.  
3  Add the mushrooms and fry for a further 5 mins, again stirring occasionally. Place in
       a small bowl.
4  Add the chestnuts, cranberry sauce and pepper to the bowl, mix well and leave to cool
       for a few mins. Stir in the cream.
5  Place one pastry circle on the opened pasty maker. Brush round the edges with water  
       or milk so that they'll stick together. Spoon half the mixture onto the centre - here's
       how they'll look:
    Then firmly close up the pasty maker. Ease it 
    open and place onto the lined (otherwise 
    greased) baking sheet. Prepare the second 
    pasty in the same way.


6  Pierce the tops of the pasties several times with a knife to allow steam to escape, then
       brush them thinly with milk. Cut out any decorations you want from the pastry
       trimmings, press on the top of the pasties and brush them with milk.
7  Bake for about 20 mins until golden and very puffed up. 

Here are mine, still in their baking tin, with one of the mince pies made with the trimmings and baked with them.
If you make these, I hope you'll love them as much as we do. There are endless variations of course, and if making for adults then a tablespoon of brandy in the filling would be good. Other versions are cheese/onion/potato (verging on the Cornish), or mixed veg such as peas, sweetcorn, chopped broccoli or French beans. Happy baking!

Thursday 8 November 2012

Definitive Two-Bean Chilli - cheap, cheerful and very tasty!

Many of us make this dish, I know, but here is my basic and favourite version.

I've costed it this time, too, working from Tesco's website today - Asda is similar. Assuming there is already a little veg or olive oil and brown sugar in the cupboard (could use white sugar but not so rich), if all other ingredients were bought especially then the following would be left over for use later: most of a bulb of garlic, some chillies, half a can of red kidney beans, a little passata, and plenty of hot chilli powder and ground cumin. Sounds like nearly everything for the next chilli ....

£3.61p! Would be quite a bit less per portion if the quantities were increased, because of 'free leftovers'. For example, around £4.60 for 4 servings and maybe £5.70 for 6. Always was good at maths at school. (Swot)

This recipe serves 2 quite heartily, and should take about 40 minutes from start to serving. It also freezes well.

Two-Bean Chilli

Ingredients
1 tsp vegetable or olive oil
1 large clove of garlic, peeled & finely chopped     (30p for whole bulb)
1 medium onion, peeled & chopped fairly finely     (10p)
1 large fresh red chilli finely snipped or chopped (including seeds)  (60p for pack)
2 tsp ground cumin                                              (57p for jar)
1.5 tsp hot chilli powder                                        (95p for jar)
2 tsp soft dark brown sugar
Half a 400g can value red kidney beans                  (20p for whole can)
1 400g can black-eyed beans                                 (59p)
350g passata (sieved cooked tomatoes)                 (30p for 500g carton)
Method
1  Heat the oil in a medium pan. Add the garlic, onion and fresh chilli and fry gently for
          8-10mins, stirring from time to time.
2  Stir in the cumin and chilli powder and fry for a further 3-4mins, again stirring 
          occasionally.
3  Add the sugar, beans and passata and mix well. Simmer gently for 15-20 minutes,
          adding a little more of the passata if the mixture is getting too thick.

Serve with ...
Tortilla chips (value, of course), or rice - or a soft bread roll that you can use to mop up the sauce at the end. I'd add a full-bodied red wine or lager, or - if it's an alcohol-free day - a carton of red grape juice.

Friday 28 September 2012

Styles of Cooking & Food Presentation - a Quiz


It's all very well when a restaurant menu states that a dish is served, say, a la bonne femme. But if they don't give an explanation and you're not sure, then your choice is to ignore it, risk it, or ask the staff.


Here's a multiple-choice quiz with ten food prep/presentation descriptions. Answers at the end, should there be any you don't know! And the pictures aren't necessarily clues. The terms are, of course, often applied to meat dishes, but are relevant to vegetables or meat substitutes. 'Nicoise' didn't make it, as it includes anchovies or sometimes tuna.
by Richard North via Flickr.com
 1  Since it's already mentioned, a la bonne femme:
       (a) produced by a female chef
       (b) rustic food served simply
       (c) with asparagus.

 2  Lyonnaise
       (a) prepared or garnished with onions
       (b) with a clear sauce of white wine and parsley
       (c) with a dark sauce containing chervil. 

 3  En Papillote
       (a) snipped to resemble a butterfly
       (b) sealed in foil or parchment and oven-cooked
       (c) encased in breadcrumbs and shallow fried.
by Sebastian Mary
via Flickr.com

4  a la Grecque
       (a) garnished with feta cheese then grilled
       (b) with olives and sundried tomatoes
       (c) vegetables cooked with herbs, olive oil, lemon juice.

5  Chasseur (or cacciatore) 
       (a) cooked in a casserole with capers
       (b) sealed in puff pastry and decorated with relevant pastry shapes
       (c) in a sauce of mushrooms, onions and white wine.

 6 Al Forno
       (a) baked or roasted in an oven
       (b) containing minced meat or meat substitute
       (c) in a rich cheese sauce topped with breadcrumbs.

7  Chevaler (or chevalier)
       (a) with each main ingredient served separately
       (b) served on toast
by Paul Esson
via Flickr.com
       (c) ingredients arranged in an overlapping pattern.    

 8  Meuniere (French: farmer's wife)       
       (a) with a sauce of shallots, tarragon and red wine
       (b) ingredients floured then fried in butter
       (c) deep fried in oil and served with a lemon sauce.

 9  Brunoise
       (a) diced and braised in butter
       (b) with a sauce made from browned/burnt flour, stock and garlic
       (c) in a thick sauce, served in a savoury pancake.

10 Provencale
       (a) a rich stew with crusty bread to mop up juices
       (b) with olive oil, tomatoes and garlic
       (c) a clear sauce, strong on rosemary, thyme and chervil.
Here are the answers:
1 (b)     2 (a)     3 (b)     4 (c)     5 (c)     6 (a)     7 (c)     8 (b)     9 (a)     10 (b)   

If you feel like it, do let me know how you got on by commenting below.

PS  Antonin Careme, in the early 1900s, declared that there are five basic sauces, and that all sauces are based on one of them. They are: Hollandaise - oil/fat and egg yolks, veloute - a thick, blond sauce of flour, stock and butter, bechamel - white sauce of flour, butter and milk, Espagnole - stock with herbs and tomatoes, and vinaigrette usually oil and vinegar. By the way, sorry no accents used with the French vocab - can't get them. Au revoir!


Sunday 23 September 2012

Chestnuts, Roasting or Otherwise - Ten Quick Facts

Wonderful sweet chestnuts are just about to come into season - usually October. They are on offer raw, cooked, candied, vacu-packed or pureed, and are really versatile. The food magazines will no doubt be giving us plenty of ways of using them in the run-up to, er, Christmas.

Here are some facts about them - good for a mention, perhaps, as everyone sits around the festive table looking forward to their nut roast wellington. Or even my lemon-stuffed cashew nut roast en croute somewhere in the history of this blog. Or whatever.

by Pauline Mak
via Flickr.com
 1  There is evidence of the cultivation of chestnuts since about 2,000 BC.

 2  Before potatoes arrived, and where wheat flour was not available, they were an
         important source of carbohydrates and could be milled into flour. The flour could be
        used to make bread, which might stay fresh for up to two weeks.

 3  Sweet chestnut trees are known in the USA as Spanish chestnuts.

 4  They have a hard outer skin, the husk or pericarpus, and a soft inner skin, the pellicle, 
         which sticks to the fruit and follows its grooves.

 5  They are enjoyed by deer, wild boar, squirrels, pigeons, jays - and the chestnut weevil.

 6  The American version weighs somewhere around 5g, and some Japanese varieties
         up to 40g. 

 7  Chestnuts can be roasted or grilled (slashing the husk first to avoid a splatting),
         peeled and deep fried until they float to the surface, boiled, or ground into flour. The
         vacu-packed versions are ready to eat, and tinned puree comes sweetened or not.

 8  They contain about 180 calories per 100g of the nut itself, lower than almonds,
         walnuts and dried fruit. There's no cholesterol or gluten, but some copper and
         vitamin C.
Marrons Glaces by Kate Hopkins
via Flickr.com
 9  Marrons glaces have been made in France since the 16th century, by softening the
         chestnuts then candying in sugar syrup. Those sold for Christmas were actually
         picked the year before. 

10 In Portugal they are traditionally eaten on St Martin's Day, November 11th, and were
         once widely to be considered to be food for the poor.

A favourite way of using these (cooked) is with chunks of mushroom, grated nutmeg and a creamy sauce, ladled over tagliatelle. But if I had an open fire, they'd be roasting by it, whether or not Jack Frost is nipping. Watch out, Merchant Gourmet, I'm after your vacu-packs already.

Thursday 6 September 2012

Courgette Fritters - my definitive recipe

It's never possible to grow just a few courgettes, it seems. Every year, food magazines roll out their recipe suggestions, and dutifully I give many of them a try. Some have been great and have made their way into my 'specials' file (named after the vegetarian restaurant I shall run when I grow up). Others have been tried and dumped, for example my stuffed courgette flowers were something and nothing and I still can't get my head around eating flowers. Also ratatouille - inevitably sloppy and lacking in guts, best whizzed into a soup is the kindest thing I can say. On the other hand, I invented courgette longboats (hollowed out and stuffed) and won a great prize for the recipe some years ago. Still make them, actually.

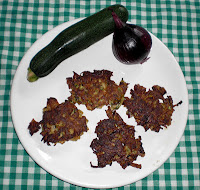
Aaaanyway. Here is my version of the recipe for fritters. Preparation takes about 20 minutes and frying 10-12. Hands get a bit messy but are easily rinsed. This quantity makes around 15 fritters, which could serve, say, 5 as a starter or 3 as a snack. For the full recipe, fry in 2 batches or use 2 large frying pans.
Courgette Fritters
Ingredients:
3 medium courgettes (about 250g), ends trimmed
1 medium onion (about 100g)
2 level tbsp flour (any, but I like gram flour)
1 scant tbsp ground cumin
1 small chilli, fresh or dried (optional), finely snipped
1 egg, lightly beaten
3-4 tbsp oil for shallow frying

Method
1  Grate the courgettes coarsely, placing the grater on 2 layers of kitchen paper so
        you can ...
2  Gather up the corners of the paper and squeeeze over the sink to extract as much
        liquid as possible. This is vital to make sure the fritters 'gel'. Place the gratings
        in a bowl and carefully remove the paper (it might try and get into the mix). An
        alternative to the kitchen paper is to put the gratings in a sieve and press hard,
        but this is less effective.
3  Peel the onion and slice finely, cutting the slices into pieces 2-3cm long, then add.
4  Add the flour, cumin, chilli (if using) and egg, and mix thoroughly.
5  Heat the oil in 1 or 2 large frying pans. When hot, place heaped tablespoonfuls of the
        mixture in, a little apart. Fry for 5-6 minutes on fairly high until well browned,
        then turn and repeat.

*               *               *               *               *

As Adam Wally used to say on children's TV, "But there's a danger element." These fritters are very light and it's a challenge not to eat more than is decent. Challenge failed in this case.

Saturday 18 August 2012

Marrow - Yum or Yuk? Ten Facts, Anyway!

It's one of life's nuisances that courgettes turn into marrows at exactly the time when their growers may be away on holiday. However, they say that size doesn't matter, so here's a sort-of homage to the vegetable marrow.

The marrow pictured here, with a pea pod for size comparison, mysteriously appeared on my doorstep while I was away. How lovely is that?

I've blogged in the 'Ten Facts About ...' style before, with the only problem being what to include and what to omit. With marrows, oddly, there is only a limited bank of information to be found, but here's what might be of interest to cooks, horticulturalists, and squash freaks.


 1  The marrow is the mature fruit of one of the squash family of plants. In its younger 
       form it is a courgette or, in the US, zucchini.

 2  They're grown from seed.

 3  They feature in their own size competitions for UK growers, like pumpkins. The
       current world record (as far as I can tell) was set in 2008 with a weight of 113
       pounds.

 4  Marrows are unusual in that they have about zero calories, fat, protein,
       cholesterol, sodium or potassium. So you could eat a whole one and still .....

 5  They can be used to make marrow and ginger jam, though I've tried this and the
       result just tastes mildly of ginger.

 6  It's pointless to freeze them; on thawing they just turn to flavourless mush.

 7  Unadorned, they have minimal flavour, but can be good in curry, stew or 
       gratin. Best known of recipes is marrow stuffed with a savoury mixture and
       baked; this works very well and it holds it shape. 

 8  They're also good cut into chunks, tossed with olive oil, crushed garlic, a pinch 
       of sugar and some salt and pepper, then roasted at a fairly high temp for about 
       45 minutes. That's what I'm planning for my special marrow.

 9  They are much less commonly grown and sold in the US than the UK.

10  Marrows seem to keep well for ages in a cool environment.

Well I stretched it to ten facts fairly successfully. Maybe I can count this as no. 11:
One year one of my courgettes got a bit above itself and we used it as a baseball bat with a tomato for the ball. I was batting, and enthusiastically hit the tomato. The tomato disintegrated and the overripe end of the courgette flew off straight into one of the panes on our hexagonal sloping greenhouse. Replacing the pane was a challenge. Don't try this at home.

Sunday 29 July 2012

Stuffed Romano Peppers - a Visual Jewel

These are very easy to make, and for once the description of 'jewel' applies to something other than (and much nicer than) pomegranates! Not that I'm biased or anything. I just think these look and taste lovely.

The recipe is versatile - apart from the peppers themselves and the egg, onion and cheese, any of the other ingredients can be substituted. Perhaps chopped walnuts instead of olives, or quartered artichoke hearts instead of mushrooms. I use Sainsbury's basic Italian hard cheese for the topping, as it looks, cooks and tastes like Parmesan (which isn't vegetarian, bleat bleat). Still, Cheddar or Emmental, even blue cheese could be used instead. 2 cloves of garlic, pressed or finely chopped, would be good, too. 
Meet & Greet

Depending how rapidly you wield a knife, prep should take about 20 minutes, then another 25 mins or so to bake. Best served straight from the oven, but they're also good at room temperature. 

The quantity given would serve 4 as a starter (i.e. one half pepper each) or 2 as a main course. Accompaniments could be baked or tiny new potatoes, fried rice, tenderstem, or CHIPS.


Ingredients
2 Romano peppers, halved lengthwise, seeds removed
1 free-range egg
2 tbsp chopped fresh herbs (e.g. rosemary, basil) or 1 tbsp dried
1 medium onion (about 60g), peeled and finely chopped
8 pitted black olives, quartered
40g mushrooms (about 3 medium), trimmed and roughly chopped
35g vegetarian hard cheese, grated
black pepper 

A shallow baking dish or tin is needed, large to hold the pepper halves in a single layer. It's a good idea to line the dish/tin with parchment. The oven should be heated to 175C.

Method
1   Keep the halved peppers on a plate or chopping board initially, so they're easy to fill.
2   Crack the egg into a medium bowl, and beat lightly.
3   Add the herbs, onion, olives, mushrooms, and half of the cheese.
4   Season the mixture well with pepper and stir until fully mixed.
5   Place the peppers into the baking dish, and divide the filling between them, pressing 
          down to flatten. Sprinkle the remaining cheese over.
Been Stuffed
6   Place the dish in the centre of the oven and bake for about 25 minutes until the cheese
          is golden and the peppers are soft.

And here's what should come out ....
Ready When You Are!


I hope you love these as much as I do. They can of course be prepped in advance and kept in the fridge for a while before baking. The 25 mins cooking time is enough for a nice glass of something white and chilled - and I'm thinking Gavi rather than milk. 

Sunday 15 July 2012

FUDGE - food of the angels

On a recent short break in Edinburgh, I accidentally found myself in The Fudge House on the Royal Mile. They sell their stuff in small bars, and I very nobly restricted myself to four different flavours. Best was white chocolate pistachio, then chocolate pecan, followed by lemon meringue and caramel.
          So how to amuse myself back at home? Having tweeted about fudge, had to put my money (and fudge) where my mouth is and make some, photograph it and blog about it before tucking in. Very sadly, the OM is not a fan of fudge, so .....
          The recipe here is one I have been using for many years, sometimes with various additions. The process takes only about 25 minutes, not including a little setting time. The fudge pictured had 40g of melted plain chocolate swirled through just before pouring into the tin, but there are plenty of other ways of making it different. And it makes a very fine gift.
          These quantities make around 450g, and would cut into maybe 30 pieces. At The Fudge House they charge (if I recall) about £2.65 per 100g, so this quantity would cost nearly £12. Making it costs only a fraction of this.

Vanilla Fudge


A fairly heavy medium-sized saucepan is needed, a wooden spoon, and a tin lined with parchment (you could just grease it but parchment is more certain). I use a 17cm square shallow baking tin. A sugar thermometer is the surest way to get the boiling time right.


Ingredients
55g butter
2 tbsp water
1 rounded tbsp golden syrup
280g sugar (preferably caster as it dissolves more quickly than granulated)
125ml condensed milk (e.g. from a squeezy tube)
1 tsp vanilla extract (otherwise use essence)

Method
1  Put the butter, water, syrup and sugar in the pan and heat gently, stirring occasionally,
          until the butter has melted and the sugar has dissolved.
2  Stir in the condensed milk and bring to the boil.
3  Boil, watching carefully and stirring occasionally, until 116C (or 240F) is reached. This
          takes about 6-8 minutes.
4  Immediately remove the pan from the heat and leave to cool for 4 minutes.
5  Add the essence and beat vigorously with the wooden spoon until the mixture becomes
          grainy.
6  Pour quickly into the lined tin and smooth over.
7  After another minute or two, mark into squares and leave to cool completely.

As well as the chocolate swirl mentioned above, other additions might included wiped quartered glace cherries, chopped pecans or pistachios, halved fresh raspberries, or 2 teaspoons of coffee essence (Camp coffee is still around and works well) perhaps with a few chopped walnuts.

Monday 2 July 2012

Ten Facts about the Luscious Strawberry

So we're in the middle of the happy strawberry season. Not that you'd know it from the skies. Still, there are plenty of strawbs in the shops, many thankfully local, so here are some facts about this, my favourite fruit. (Although I'm very fond of Sharon fruit, raspberries and lychees too.)
by sigusr0
via flickr.com
Strawberries
 1  They are a member of the rose family. (Much nicer though. Discuss.)
 2  Apart from humans, keen munchers of this fruit include aphids, thrips, weevils, beetles, 
          birds and moths as well our beloved national slimeball, the sl*g.
 3  They're rich in vitamin C.
 4  100g of this fruit contains only about 30 calories.
 5  The 17th century English writer Dr William Butler wrote about the strawberry:  
          "Doubtless God could have made a better berry, but doubtless He never did."
 6 This is the only fruit to bear its seeds on the outside - on average about 200 of them.
 7  Belgium has a museum dedicated solely to the strawberry. It's in Wepion, on the banks
          of the river Meuse, and is apparently rather small.
 8 The flowers are considered hermaphrodite; the fruit is commercially propagated from
          runners.
 9 Medieval stonemasons carved strawberries around the tops of pillars and on altars in
          churches and cathedrals, since they were said to symbolise perfection and
          righteousness.
10 For a similar reason, in Shakespeare's Othello, Desdemona's handkerchief is
          decorated with strawberries.
by Sancho McCann via flickr.com
Finally, has anyone yet tried the new variety which is white with red seeds? Said to be just as lovely, but I can't believe the 'experience' would be the same. 


Some of these facts are courtesy of The University of Illinois.

Thursday 28 June 2012

Goat Cheese & Pear Tempura with Reduced Balsamic: Starter

Having created two mains and a dessert for the Capricorn challenge, it was time to consider a starter. I've always loved tempura, and have coveted deep-fried camembert which is not suitable for vegetarians. Also wanted to work out how to make the famous 'balsamic reduction' so beloved of modern chefs as a drizzle. So I've created my versions of all three of these for this recipe, and of the seven ingredients (excluding frying oil), four came from Ethel the Goat's very lovely hamper.


It does need constant attention for the (approximate) 25 minutes needed from start to serving. The tempura should be served as soon as it's ready. Or, if this has to be fried in two batches, the first when ready should be kept hot in the oven, and the balsamic should be drizzled over at the last moment. These quantities serve two. The recipe uses cider, but you could use sparkling water or lager. I garnished with land cress leaves from the garden, and walnuts (I'd have toasted the walnuts but forgot until it was too late).


Goat Cheese & Pear Tempura with Reduced Balsamic
Ingredients
50ml dark balsamic vinegar
1 tsp soft dark brown sugar
1 Capricorn goat cheese, cut into 8 wedges
1 firm pear, peeled, cored, and cut into 8 slices
3 tbsp plain flour
2 tsp cornflour
Half a lightly beaten egg
30ml cider
Oil (vegetable type), enough to cover the tempura.

Method
1  For the 'reduction', bring the vinegar and sugar to the boil in a very small pan, and 
          simmer gently for 3 minutes, stirring occasionally. Remove from heat and set aside.
2  Prepare the goat cheese and the pear as above.  
3  For the batter, place the flour, cornflour and egg in a bowl and use a whisk to blend 
          them. 
4  Add the cider and whisk briefly again - don't worry if there is still the odd lump of flour.
5  Heat the oil to very hot. Test that it's ready by dripping in a drop of batter; it should
          sizzle and rise straight to the top.
6  Coat the cheese and pear wedges individually in the batter and place in the hot oil.
          Fry for 4-5 minutes until each piece is browned, stirring from time to time with a
          heatproof slotted spoon to keep them separate.
7  When the tempura is nearly ready, heat the balsamic gently so that it's ready to pour.
8  Serve the tempura on a hot plate, drizzle with the balsamic and serve toute suite!

Have to say, this was scrumptious. The reduction worked well, the pears retained their flavour, and the cheese was quietly starting to ooze out from the batter as it was served. This dish could arguably be garnished as a dessert, say with my salted caramel drizzle instead of balsamic and with a couple of small fresh fruits on the side. Still, I liked it as a starter, not least because it needs attention and diners would have to talk among themselves for a while if the tempura were to be their dessert.


Monday 25 June 2012

Courgette, Goat Cheese & Mushroom Tart - without pastry!

Number 3 of my recipes for the Capricorn challenge is this savoury tart with a pleasing mixed consistency and rich, tangy flavour. Its sort-of Unique Selling Point is that it has no pastry and is wheat-free - the case is a crunchy rice-based shell which has its own tempting taste. It's a nice one to make for anyone avoiding wheat for whatever reason.


This is dear to my heart, as around twenty years ago, I suffered unexplained but severe abdominal pains and a great weariness. The NHS kindly tested all parts of me for possible causes, even considering the London School of Hygiene and Tropical Medicine as I'd been to Bangladesh (to see the work of a charity) not long before. Eventually I discovered the problem myself: the symptoms came on severely a couple of hours after eating a salad sandwich on wholemeal bread. Bingo! For about three years after that I went to enormous trouble to avoid wheat, though within a few days I was back to my normal bouncy self - couldn't believe it at first. Eventually I cautiously took a small amount of wheat and built up, and after that my diet became normal. Result! Anyway, back to the job in hand.


This recipe will serve 4-5 as a main course, and it can be eaten straight from the oven, warm, or at room temperature (e.g. at a picnic). It takes about 90 minutes from start to serving. It has quite a number of ingredients and stages, but they aren't difficult. A number of alternatives are listed for the ingredients, with the most suitable first.

Courgette, Goat Cheese and Mushroom Tart in a Rice Case
The oven should be heated to 175C or 160C for fan, shelf in the centre. 
A non-stick straight-sided flan tin or oven-proof dish is needed, ideally about 4cm deep and 21cm in diameter. For insurance, the base should be lined with a baking parchment circle. (Place tin on parchment, draw round the outside of the base, then cut just within the line.
Ingredients
100g risotto rice (otherwise long grain is fine)
150 courgettes (approx 1 large or 2 medium), trimmed and sliced fairly finely
75ml stock (or water)
60g Emmental cheese (or cheddar), coarsely grated
3 free-range eggs (1 with yolk/white separated)
2 tsp cornflour
80ml milk
30ml double cream
60g goat cheese (pref Capricorn), crumbled
100g mushrooms, trimmed and sliced fairly finely
1 level tsp grated nutmeg

Method
1  Bring 600ml water to the boil in a large pan. Add the rice and simmer for 15 mins until
          just softening. Drain in a colander, run cold water over to cool it and drain again.
2  Meanwhile, put the courgettes in a small pan with the stock or water. Bring to the boil
          and simmer uncovered for 10 minutes. Drain well and pat gently with kitchen paper 
          to remove some more of the liquid.
3  Place the rice in a bowl with 40g of the Emmental/cheddar and the egg white, and mix
          thoroughly. Press over the base and sides of the lined tin to make an even case
          with no gaps. Bake in the oven for 5 mins then allow to cool a little. (Keep oven on.)
4  Place the cornflour in a medium bowl and add a little of the milk. Stir to a smooth paste
          and then add the remaining milk, the cream, the 2 whole eggs and single yolk, 
          mixing well. Stir in the goat cheese, mushrooms, courgettes and nutmeg.
5  Pour this filling into the rice case and smooth over, making sure the 'bits' are evenly
          spread. Sprinkle the remaining 20g cheese over the tart and bake for 30-35 mins
          until it is puffed up and browned all over.


The crunchy rice shell is very versatile. The vegetables can be endlessly varied; I'm thinking tomatoes, asparagus, peppers, chopped tenderstem broccoli or artichoke hearts, with added thyme, walnuts or toasted pine nuts. And now I'm really hungry!


Sunday 24 June 2012

Pear, Goat Cheese & Cranberry Tartlets with Salted Caramel Drizzle

This is my second entry for EthelTheGoat's Capricorn Challenge. The tartlets themselves have only six ingredients, three of which came from the magic hamper sent by Ethel to fire our imaginations.


Depending on how good you are with rolling/cutting pastry, this recipe should take about 35 minutes from start to serving - the drizzle is made while the tartlets are baking.


Brag Alert:
Of all the desserts I've created over the years - some of which have won prizes - I have to say that this is the one that I most enjoyed eating. It will turn up, for sure, next time we have guests for a meal.


For a change, this recipe makes three tartlets, and I know many people make meals for three. It was also just the way it turned out with the single egg and the pear. The tartlets are best served straight from the oven, as they are so puffed up and fanciable, though warm is OK too. At room temperature they are still good but look flatter. The drizzle should be served warm - it's optional of course, and can be made to go with plenty of other desserts such as plain vanilla ice cream, meringues, large fruit tarts, coffee gateau or fruit salad.


The tartlets here were made in a tray of individual Yorkshire pudding tins; they could be made in smaller jam tart sized tins but they're then gone in a couple of mouthfuls. Not enough! Here's one pictured on a side plate:
Pear, Goat Cheese & Cranberry Tartlets with Salted Caramel Drizzle
Ingredients for the Tartlets
     90g puff pastry (or 1 ready-rolled sheet)
     1 free range egg
     25g Capricorn goat cheese, crumbled
     2 tsp double cream
     1 dessert pear, peeled, quartered, cored & coarsely sliced
     24 dried cranberries (about 20g) (or fresh)
Ingredients for the Drizzle
     75ml double cream
     2 tbsp golden syrup (about 65g)
     25g soft brown sugar (dark or light)
     15g butter
     Half tsp salt

The oven should be heated to 200C, or 180C fan, shelf in the centre. The Yorkshire pudding/tartlet tins should be very lightly oiled.

Method
1  On a floured board, roll out the pastry to an area large enough to cut out three 
          11cm-diameter circles - and cut them out. Press gently into the tartlet tins.
2  Crack the egg into a small bowl and add the Capricorn cheese and the cream. Beat
          gently with a fork until evenly mixed.
3  Place the pear slices neatly into the cases, and pour the egg mixture evenly over them.
4  Sprinkle the cranberries over the tartlets.
5  Bake for 15 minutes or so, until the pastry is browned and the filling well set.
6  Meanwhile, to make the drizzle, place the cream, syrup and brown sugar in a small pan
          and bring to the boil, stirring. Simmer gently for 3 minutes then remove from heat.
7  Stir in the butter and the salt. Check for taste (it'll be very hot) in case you feel another
          pinch of salt is needed.
8  Serve the tartlets as soon as possible, pouring the drizzle over and around each one.

It's best not to put the filling into the tartlets until it's time to bake them, otherwise the pastry could go soggy. I filled mine and put them in to bake just as a light main course was served, but the drizzle had been made beforehand. If you tend to linger over main courses - which I know we should - then the drizzle can be made in advance and kept warm, and the tartlets quickly filled and put in the oven as soon as the first diner has finished the main course!
-----------

I've a dream that will never come true, but I enjoy dreaming it. We open a smart vegetarian restaurant called 'Specials', which becomes famous and successful. Whenever I create a dish that's especially pleasing, I always think, 'That can go on the menu at Specials', and then work out how much it costs to make and what we would charge for it. Daydream par excellence.